API에 데이터를 게시하는 것은 결코 쉬운 일이 아닙니다. 하지만 React를 사용하여 Google Sheets에 양식 데이터를 게시 한 적이 있습니까? 그렇지 않다면 이 튜토리얼은 당신을 위한 것입니다.
오늘은 React에서 REST API와 같은 Google Sheets로 양식 데이터를 게시하는 방법에 대해 설명하겠습니다.
먼저 React 앱을 만듭니다.
시작하려면 create-react-app을 사용하여 React 앱을 설정할 수 있습니다.
npx create-react-app react-googlesheets를 입력하여 프로젝트 디렉토리를 설정하세요.

폴더 구조
시맨틱 UI를 설치하는 방법
시맨틱 UI는 아름답고 반응이 빠른 레이아웃을 디자인하고 개발하는 데 사용되는 프레임 워크입니다. 버튼, 컨테이너, 목록, 입력 등에 대한 구성 요소가 있습니다.
React 애플리케이션에 Semantic UI를 설치하려면 다음 명령을 사용하십시오.
npm install semantic-ui-react semantic-ui-css설치가 완료되면 index.js 파일을 열고 맨 위에 다음을 가져옵니다.
import 'semantic-ui-css/semantic.min.css'이제 npm start 명령을 사용하여 앱을 실행합니다.
입력 상자를 만들어 보겠습니다.
React 앱에서 이름, 나이, 급여 및 취미와 같은 입력을 얻기 위해 양식과 입력 상자를 만들어 보겠습니다.
여기서는 semantic-ui-react 라이브러리에서 Buttons, Form, Container 및 Header를 가져 와서 양식 필드를 만듭니다.
import React, { Component } from 'react'
import { Button, Form, Container, Header } from 'semantic-ui-react'
import './App.css';

export default class App extends Component {
  render() {
    return (
    <Container fluid className="container">
      <Header as='h2'>React Google Sheets!</Header>
      <Form className="form">
        <Form.Field>
          <label>Name</label>
          <input placeholder='Enter your name' />
        </Form.Field>
        <Form.Field>
          <label>Age</label>
          <input placeholder='Enter your age' />
        </Form.Field>
        <Form.Field>
          <label>Salary</label>
          <input placeholder='Enter your salary' />
        </Form.Field>
        <Form.Field>
          <label>Hobby</label>
          <input placeholder='Enter your hobby' />
        </Form.Field>

        <Button color="blue" type='submit'>Submit</Button>
      </Form>
    </Container>
    )
  }
}
App.js
.form{
  width: 500px;
}

.container{
  padding:20px
}
App.css
다음과 같이 표시됩니다.
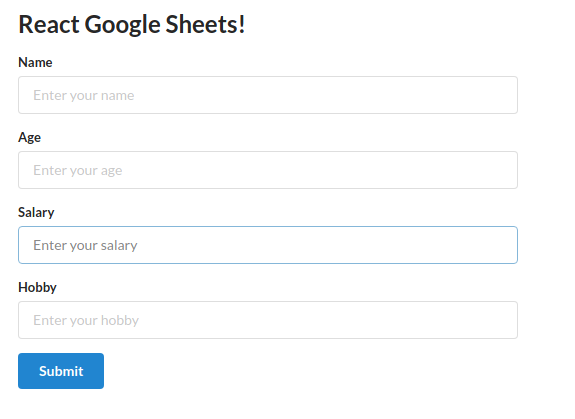
출력 양식
이제 UI가 끝났습니다. 몇 가지 기능을 추가해 보겠습니다.
먼저 생성자에서 4 개의 양식 필드에 대한 상태를 만들어 보겠습니다.
import React, { Component } from 'react'
import { Button, Form, Container, Header } from 'semantic-ui-react'
import './App.css';

export default class App extends Component {
  constructor(props) {
    super(props)

    this.state = {
       name: '',
       age: '',
       salary: '',
       hobby: ''
    }
  }

  changeHandler = (e) => {
    this.setState({[e.target.name] : e.target.value})
  }

  submitHandler = e => {
    e.preventDefault();
    console.log(this.state);
  }

  render() {
    const { name, age, salary, hobby } = this.state;    (*)
    return (
    <Container fluid className="container">
      <Header as='h2'>React Google Sheets!</Header>
      <Form className="form">
        <Form.Field>
          <label>Name</label>
          <input placeholder='Enter your name' />
        </Form.Field>
        <Form.Field>
          <label>Age</label>
          <input placeholder='Enter your age' />
        </Form.Field>
        <Form.Field>
          <label>Salary</label>
          <input placeholder='Enter your salary' />
        </Form.Field>
        <Form.Field>
          <label>Hobby</label>
          <input placeholder='Enter your hobby' />
        </Form.Field>

        <Button color="blue" type='submit'>Submit</Button>
      </Form>
    </Container>
    )
  }
}
여기에는 4 개의 양식 필드와 각각의 상태가 있습니다. 입력 값의 변경을 추적하는 changeHandler 메서드도 있습니다.
render 메서드에서 상태를 해체하고 해당 값을 입력의 값 속성 (* 줄)에 추가해 보겠습니다.
마지막으로 필요한 것은 onSubmit 핸들러입니다. 양식 태그에서 onSubmit 이벤트를 추가하고 submitHandler 메소드를 지정하십시오.
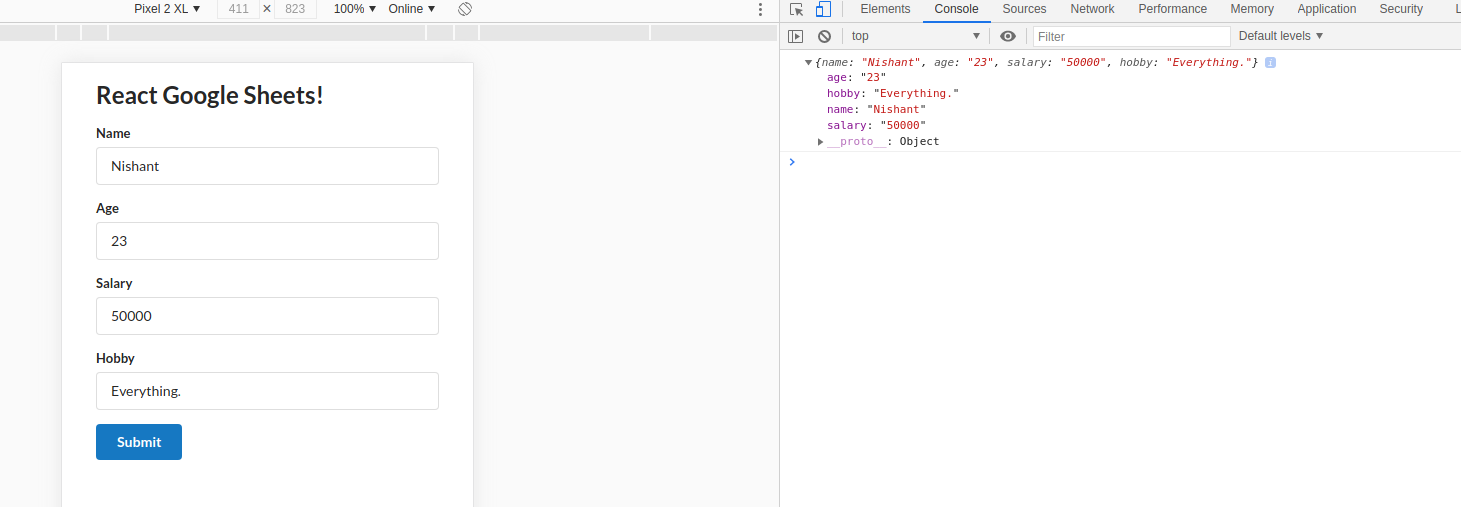
양식을 작성하고 제출을 클릭하십시오. 콘솔에 입력 된 데이터가 표시됩니다.
그게 다입니다. 이름, 나이, 급여 및 취미를 가져 와서 콘솔에 로그인하는 양식이 있습니다.
Google 스프레드 시트에 데이터를 게시하는 방법
Google 시트를 REST API로 변경해 보겠습니다.
REST API로 Google Sheets에 데이터를 게시 할 예정이며 이를 위해 Axios를 설치해야 합니다. 가져 오기와 마찬가지로 API에 요청을 보내는 데 사용할 수 있는 라이브러리입니다.
파일, 새로 만들기, 스프레드 시트를 차례로 클릭하여 새 스프레드 시트를 엽니다.
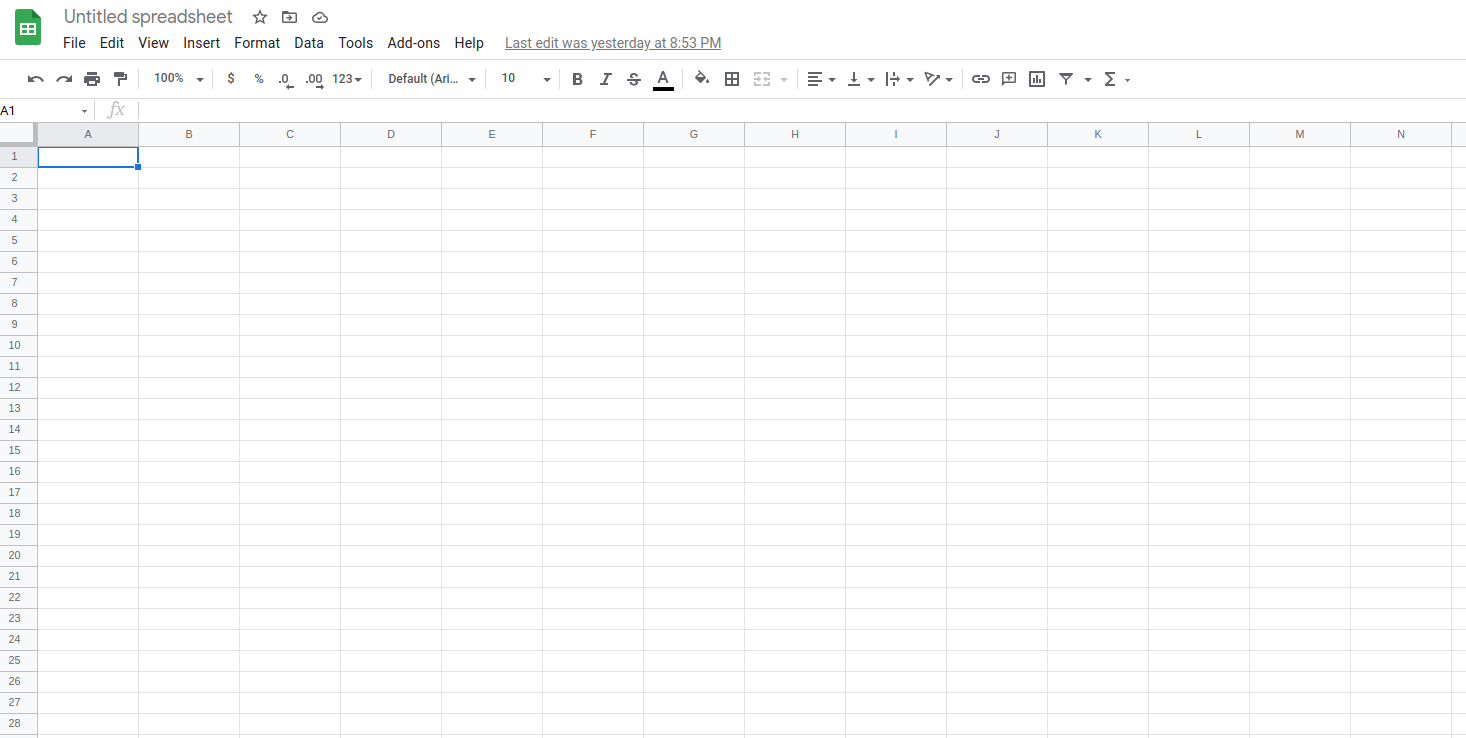
원하는 이름으로 시트 이름을 지정하고 저장합니다.
화면 오른쪽 상단의 공유 버튼을 클릭하고 공개 권한을 수정하세요.
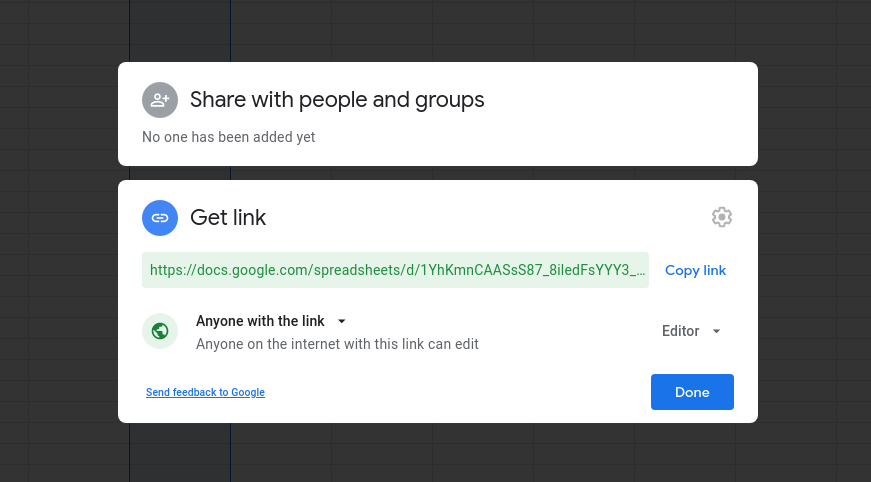
링크를 복사하고 https://sheet.best/로 이동하여 무료 계정을 만드십시오.
새 연결을 만들고 연결 URL 상자에 Google 스프레드 시트에서 복사 한 URL을 붙여 넣습니다.
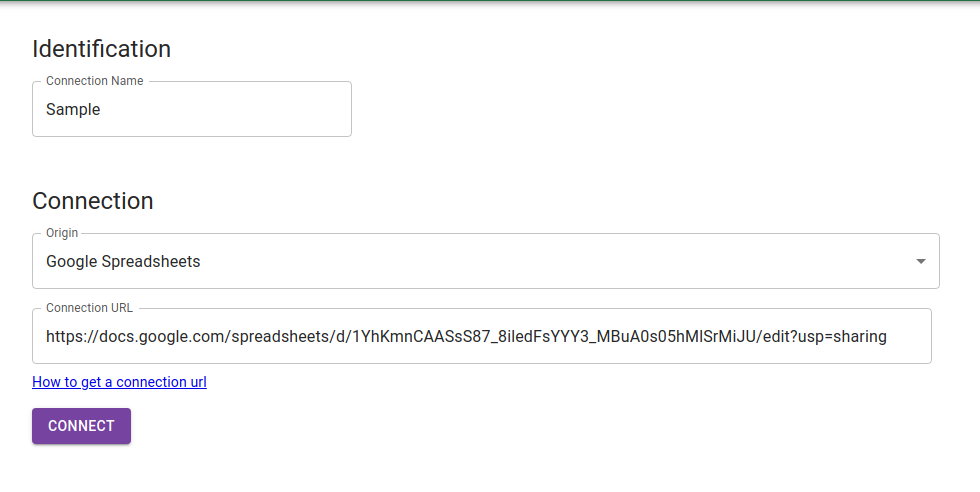
연결을 클릭하십시오. 연결 페이지로 리디렉션됩니다. 여기에서 모든 연결을 볼 수 있습니다. 새 연결의 세부 정보를 클릭하십시오.

연결 URL을 복사합니다. 이 URL은 POST 요청을 보내기 위한 끝점으로 사용됩니다.
이제 Axios를 설치하겠습니다. 패키지를 설치하려면 터미널에 npm install axios를 입력하십시오.
설치 한 후 파일 상단으로 가져옵니다. submitHandler 함수에서 POST 요청을 작성합니다.
submitHandler = e => {
    e.preventDefault();
    console.log(this.state);

    axios.post('url', this.state)
    .then(response => {
      console.log(response);
    })
  }
submitHandler 메서드
submitHandler 함수를 위의 코드로 바꿉니다. 여기에서는 Axios를 사용하여 데이터를 URL에 게시하고 .then 키워드를 사용하여 콘솔에서 응답을 받습니다.
sheet.best에서 복사한 CONNECTION URL 끝점을 붙여 넣고 axios.post('url')의 URL로 바꿉니다.
submitHandler = e => {
    e.preventDefault();
    console.log(this.state);

    axios.post('https://sheet.best/api/sheets/a6e67deb-2f00-43c3-89d3-b331341d53ed', this.state)
    .then(response => {
      console.log(response);
    })
  }
submitHandler function
이제 Google 스프레드 시트를 열고 이름, 나이, 급여 및 취미라는 첫 번째 열을 채웁니다. 신중하게 작성하지 않으면 작동하지 않습니다. 대소 문자를 구분해야 합니다.
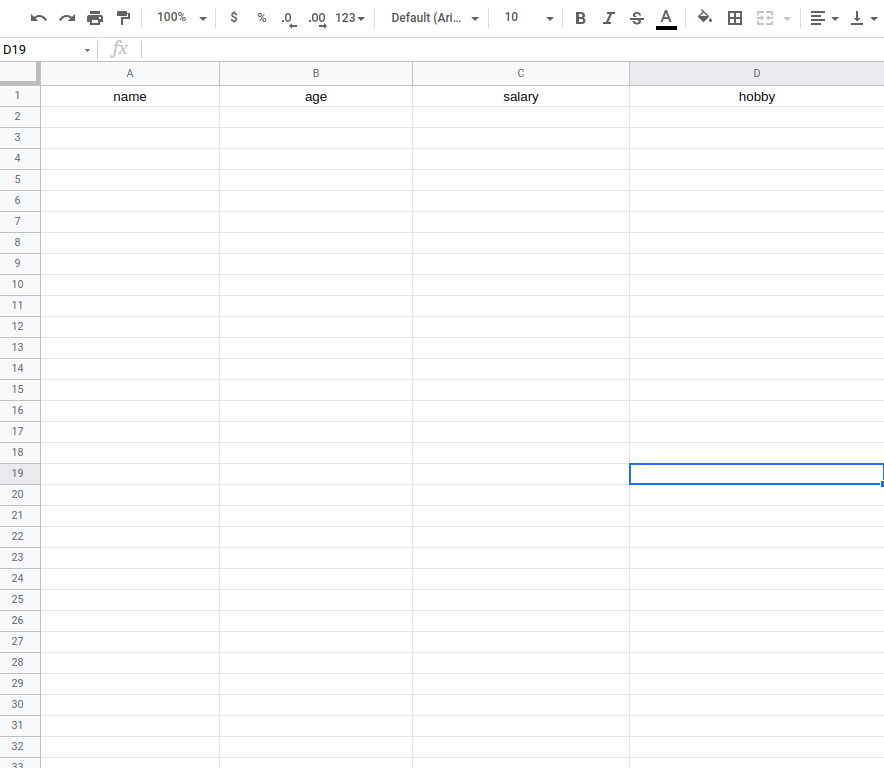
이름, 나이, 급여 및 취미 필드 추가
이제 React 앱을 실행하고 입력 필드를 채우십시오. 데이터가 Google 스프레드 시트에 하나씩 채워지는 것을 볼 수 있습니다.
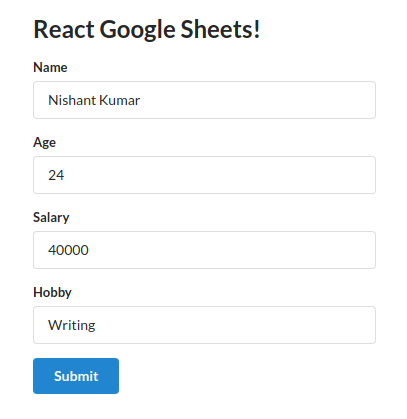
React form
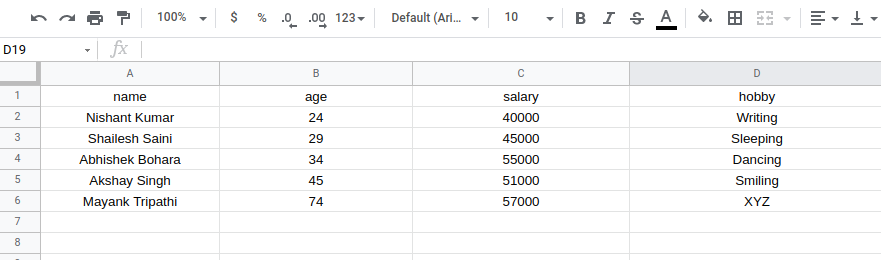
Sample Fields
그게 다야. 이제 Google 스프레드 시트를 REST API로 전환하는 방법을 알았습니다. 이제 React 애플리케이션을 사용하여 데이터를 Google Sheets에 저장합니다.
또는 Github에서 코드를 찾아 실험 할 수 있습니다.
https://www.freecodecamp.org/news/react-and-googlesheets/
등록된 댓글이 없습니다.