새로운 소프트웨어를 배우고 실험 할 수 있는 환경을 구축하십시오.
퍼블릭 클라우드 환경을 구축하고 해체 할 수 있다는 것은 매우 유용하지만 우리 대부분은 퍼블릭 클라우드에 쉽게 액세스 할 수 없습니다. 차선책은 로컬 머신에 랩을 두는 것이지만 로컬 머신에서 실행하더라도 성능, 유연성 및 기타 문제가 발생합니다. 대부분의 경우 로컬 컴퓨터의 추가 워크로드는 일상적인 작업을 방해하며 새 소프트웨어를 사용하고 실험 할 수 있는 즉시 사용 가능한 환경을 확보하지 못합니다.
저희 팀과 저는 몇 년 전 Ansible을 배우기 시작했을 때 이 문제에 직면했습니다. 개별적으로 사용할 수있는 환경을 찾을 수 없었고 상황에 대한 좌절감으로 인해 실험을 중단하는 사람들도있었습니다. 우리는 해결책을 찾아야 한다는 것을 알고 있었습니다.
우리는 옵션을 조사하는 데 많은 시간을 보냈고 우리가 완전히 통제하는 환경에서 우리의 호기심을 배울 수 있는 도구 세트를 생각해 냈습니다. 온 프레미스 랩이나 퍼블릭 클라우드에 액세스 할 필요 없이 로컬 머신에서 랩 환경을 가동하고 해체 할 수 있습니다.
이 기사에서는 완전히 자동화 된 방식으로 단 20 분 만에 로컬 머신에 자체 랩 환경을 배포하는 방법을 설명합니다.
이 연습에 대한 모든 코드는 내 GitHub 저장소에서 찾을 수 있습니다.
도구 및 소프트웨어
이 솔루션은 다음 도구와 소프트웨어를 사용합니다.
환경을 구축하려면 다음을 설정해야 합니다.
실습 환경에는 무엇이 있습니까?
이 프로젝트는 일부 사전로드 및 사전 구성된 애플리케이션 (httpd 및 MySQL)과 함께 Ansible 엔진 및 여러 Linux 노드가 있는 Ansible 호스트를 배포하는 것을 목표로 합니다. 또한 테스트 중에 가상 머신 (VM)의 상태를 모니터링 할 수 있도록 Cockpit을 활성화합니다. 사전 배포 된 애플리케이션을 사용하는 이유는 효율성 때문입니다 (따라서 이러한 구성 요소를 설치하는 데 시간을 소비 할 필요가 없음). 이를 통해 역할 및 플레이 북을 만들고 위에 나열된 도구로 배포 된 환경에 대한 테스트에 집중할 수 있습니다.
사용 사례에 가장 적합한 시나리오는 다중 머신 Vagrant 환경이라고 결정했습니다. Vagrantfile은 두 개의 대상 호스트와 Ansible 제어 시스템을 시뮬레이션 하기 위해 세 개의 CentOS VM을 생성합니다.
여러 하이퍼 바이저 활성화
일부 하이퍼 바이저는 둘 이상의 하이퍼 바이저를 사용 중인 경우 VM을 가져 오지 못하도록 할 수 있습니다. 이 문제를 해결하려면 다음 단계를 따르세요 (Vagrant의 설치 지침에 따라).
먼저 하이퍼 바이저의 이름을 찾으십시오.
$ lsmod | grep kvm
kvm_intel 204800 6
kvm 593920 1 kvm_intel
irqbypass 16384 1 kvm
내가 관심 있는 것은 kvm_intel이지만 다른 것을 원할 수도 있습니다 (예 : kvm_amd).
다음을 루트로 실행하여 하이퍼 바이저를 블랙리스트에 추가하십시오.
$ echo 'blacklist kvm-intel' >> /etc/modprobe.d/blacklist.conf
컴퓨터를 다시 시작하고 Vagrant를 다시 실행하십시오.
The Vagrant file
cat Vagrantfile
# -*- mode: ruby -*-
# vi: set ft=ruby :
Vagrant.configure("2") do |config|
# Define VMs with static private IP addresses, vcpu, memory and vagrant-box.
boxes = [
{
:name => "web1.demo.com", ⇒ Host1 this is one of the target nodes
:box => "centos/8", ⇒ OS version
:ram => 1024, ⇒ Allocated memory
:vcpu => 1, ⇒ Allocated CPU
:ip => "192.168.29.2" ⇒ Allocated IP address of the node
},
{
:name => "web2.demo.com", ⇒ Host2 this is one of the target nodes
:box => "centos/8",
:ram => 1024,
:vcpu => 1,
:ip => "192.168.29.3"
},
{
:name => "ansible-host", ⇒ Ansible Host with Ansible Engine
:box => "centos/8",
:ram => 8048,
:vcpu => 1,
:ip => "192.168.29.4"
}
]
# Provision each of the VMs.
boxes.each do |opts|
config.vm.define opts[:name] do |config|
# Only Enable this if you are connecting to Proxy server
# config.proxy.http = "http://usernam:password@x.y:80"⇒ Needed if you have a proxy
# config.proxy.https = "http://usernam:password@x.y:80"
# config.proxy.no_proxy = "localhost,127.0.0.1"
config.vm.synced_folder ".", "/vagrant", id: "vagrant-root", disabled: true
config.ssh.insert_key = false
config.vm.box = opts[:box]
config.vm.hostname = opts[:name]
config.vm.provider :virtualbox do |v| ⇒ Defines the vagrant provider
v.memory = opts[:ram]
v.cpus = opts[:vcpu]
end
config.vm.network :private_network, ip: opts[:ip]
config.vm.provision :file do |file|
file.source = './keys/vagrant' ⇒ vagrant keys to allow access to the nodes
file.destination = '/tmp/vagrant' ⇒ the location to copy the vagrant key
end
config.vm.provision :shell, path: "bootstrap-node.sh" ⇒ script that copy hosts entry
config.vm.provision :ansible do |ansible| ⇒ declaration to run ansible playbook
ansible.verbose = "v"
ansible.playbook = "playbook.yml" ⇒ the playbook used to configure the hosts
end
end
end
end
주의해야 할 중요한 파일은 다음과 같습니다.
필요에 따라 이러한 파일을 조정할 수 있습니다. Ansible의 유연성은 필요에 따라 환경을 선언적으로 변경할 수 있는 능력을 제공합니다.
랩 환경 배포
먼저 GitHub 저장소에서 코드를 복제합니다.
$ git clone https://github.com/mikecali/ansible-labs-101.git
Cloning into 'ansible-labs-101'...
remote: Enumerating objects: 15, done.
remote: Counting objects: 100% (15/15), done.
remote: Compressing objects: 100% (13/13), done.
remote: Total 15 (delta 2), reused 10 (delta 0), pack-reused 0
Unpacking objects: 100% (15/15), 6.82 KiB | 634.00 KiB/s, done.
다음으로 디렉토리를 vagrant-session-2로 변경하고 내용을 확인합니다.
$ ls
Bootstrap-node.sh inventory keys playbook.yml README.md Vagrantfile
이제 랩 환경에 필요한 모든 아티팩트와 구성 파일이 있습니다. 환경을 배포하려면 다음을 실행하세요.
$ vagrant up
괜찮은 인터넷 연결로 실행 환경을 얻는 데 약 20 분 밖에 걸리지 않습니다.
$ vagrant up
Bringing machine 'web1.demo.com' up with 'virtualbox' provider...
Bringing machine 'web2.demo.com' up with 'virtualbox' provider...
Bringing machine 'ansible-host' up with 'virtualbox' provider...
==> web1.demo.com: Importing base box 'centos/8'...
==> web1.demo.com: Matching MAC address for NAT networking...
==> web1.demo.com: Checking if box 'centos/8' version '1905.1' is up to date...
==> web1.demo.com: Setting the name of the VM: ansible-labs_web1democom_1606434176593_70913
==> web1.demo.com: Clearing any previously set network interfaces...
==> web1.demo.com: Preparing network interfaces based on configuration...
web1.demo.com: Adapter 1: nat
web1.demo.com: Adapter 2: hostonly
==> web1.demo.com: Forwarding ports...
web1.demo.com: 22 (guest) => 2222 (host) (adapter 1)
==> web1.demo.com: Running 'pre-boot' VM customizations...
==> web1.demo.com: Booting VM...
==> web1.demo.com: Waiting for machine to boot. This may take a few minutes...
web1.demo.com: SSH address: 127.0.0.1:2222
web1.demo.com: SSH username: vagrant
web1.demo.com: SSH auth method: private key
[...]
플레이 북 실행이 완료되면 다음과 같은 출력이 표시됩니다.
PLAY RECAP *********************************
Ansible-host : ok=20 changed=11 unreachable=0 failed=0 skipped=0 rescued=0 ignored=3
Real 18m14.288s
User 2m26.978s
Sys 0m26.849s
모든 VM이 실행 중인지 확인합니다.
$ vagrant status
Current machine states:
Web1.demo.com running (virtualbox)
Web2.demo.com running (virtualbox)
ansible-host running (virtualbox)
[...]
VM 중 하나에 로그인하여 추가로 조사 할 수 있습니다. ansible-host에 액세스합니다.
> vagrant ssh ansible-host
Activate the web console with: systemctl enable --now cockpit.socket
Last login: Thu Nov 26 12:21:23 2020 from 10.0.2.2
[vagrant@ansible-host ~] uptime
16:46:42 up 1:24, 1 user, load average: 0.00, 0.01, 0.04
마지막으로 Ansible 모듈을 사용하여 생성 한 다른 노드를 ping 할 수 있습니다.
[vagrant@ansible-host]$ ansible -i inventory-test.yaml \
webservers -m ping -u vagrant
192.168.29.2 | SUCCESS => {
"Ansible-facts": {
"Discovered_interpreter_python": "/usr/libexec/platform-python"
},
"Changed": false;
"Ping": "pong"
}
[...]
정리
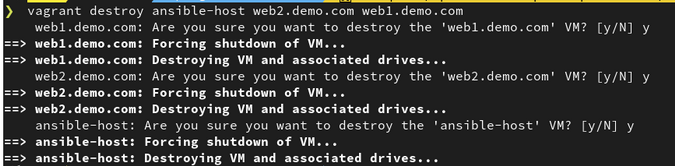
다음을 실행하여 환경을 정리하십시오.
$ vagrant destroy [vagrant machine name]
출력은 다음과 같습니다.
창의적으로 배우기
자신의 실험실에서 자신의 시간에 Ansible과 같은 소프트웨어를 배우는 것은 좋은 습관이지만 통제 할 수 없는 제약으로 인해 어려울 수 있습니다.
때로는 창의력을 발휘하고 다른 방법을 찾아야 합니다. 오픈 소스 커뮤니티에는 선택할 수 있는 많은 옵션이 있습니다. 이러한 도구를 선택한 주된 이유 중 하나는 일반적으로 사용되며 많은 사람들에게 친숙하기 때문입니다.
또한 이러한 플레이 북은 내가 원하는 만큼 최적화되어 있지 않습니다. 자유롭게 개선하고 의견에 작업을 공유하십시오.
https://opensource.com/article/20/12/ansible-lab
등록된 댓글이 없습니다.