비디오 스트리밍 앱을 만들고 MongoDB에 비디오를 저장 하시겠습니까? 스트리밍 부분에 대해 배우고 싶다면 순수하게 NodeJS를 사용하여 다른 (성공적인) 게시물을 만들었습니다.
동영상을 MongoDB에 저장하고 NodeJS를 통해 스트리밍 하는 방법도 알고 싶다면 이 게시물이 있습니다!
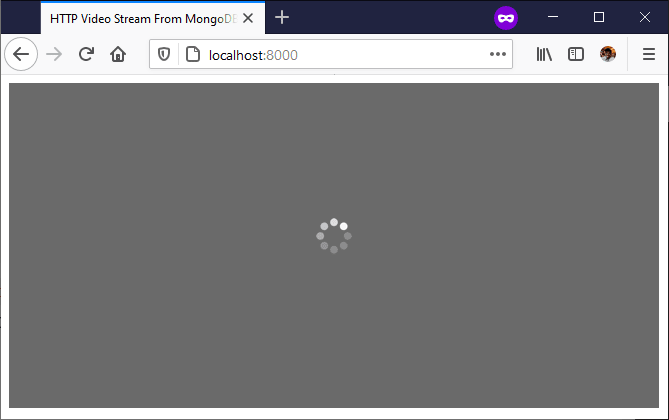
최종 결과

순수한 NodeJS 솔루션과 마찬가지로 최종 결과는 서버에서 비디오를 스트리밍 하는 단일 HTML5 비디오입니다. 타임 라인의 회색 막대를 보십시오! 그것은 버퍼링입니다! ?
프로젝트를 git 복제하려면 여기에 저장소 https://github.com/Abdisalan/blog-code-examples/tree/master/mongo-http-video에 대한 링크가 있습니다.
이지 모드
Docker가 설치되어있는 경우 패키지를 설치할 필요 없이 내 docker compose 파일을 사용하여 프로젝트를 실행할 수 있습니다. 이러한 docker compose 명령을 실행하고 bigbuck.mp4 파일을 http-video-stream 폴더에서 mongo-http-video 폴더로 복사하기만 하면 됩니다.
docker-compose up -d
# When you're done with it, you can tear it down using
docker-compose down -v
그리고 프로젝트는 localhost : 8000에서 실행됩니다.
기사의 나머지 부분은 처음부터 빌드하는 방법에 대한 지침입니다. 즐겨!
1 부 : MongoDB
MongoDB는 Linux 용 Windows 하위 시스템 (WSL)을 지원하지 않으므로 WSL을 사용하려면 docker를 사용하는 것이 좋습니다. 그렇지 않으면 Windows에서 잘 작동합니다.
MongoDB를 설치하고 Windows를 사용하는 경우 다음 명령 (exe 파일)은 C : \ Program Files \ MongoDB \ Server \ 4.4 \ bin에 있어야 합니다.
해당 폴더에서 터미널을 열거나 PATH에 추가하고 mongod 프로세스를 시작하십시오.
mongod2 부 : 노드 프로젝트 설정
다른 터미널에서 이 명령은 프로젝트 폴더를 만들고 노드 프로젝트를 시작합니다.
mkdir mongo-video-stream
cd mongo-video-stream
npm init
npm install --save express nodemon mongodb
파트 3 : index.html
HTML5 Video 요소가 있는 페이지를 만들고 소스를 "/ mongo-video"로 설정해야 합니다. 여기서 서버는 mongoDB에서 비디오를 스트리밍 합니다.
<!DOCTYPE html>
<html lang="en">
  <head>
    <meta charset="UTF-8" />
    <meta name="viewport" content="width=device-width, initial-scale=1.0" />
    <title>HTTP Video Stream From MongoDB</title>
  </head>
  <body>
    <video id="videoPlayer" width="650" controls muted="muted" autoplay>
      <source src="/mongo-video" type="video/mp4" />
    </video>
  </body>
</html>
파트 4 : Index.js
루트 "/"엔드 포인트가 index.html 페이지를 제공하도록 노드 서버를 설정합니다.
const express = require("express");
const app = express();

app.get("/", function (req, res) {
  res.sendFile(__dirname + "/index.html");
});

app.listen(8000, function () {
  console.log("Listening on port 8000!");
});
파트 5 : package.json-서버 실행
npm start 명령을 사용하여 서버를 실행할 수 있도록 package.json에 시작 스크립트를 추가합니다.
{
  "scripts": {
    "start": "nodemon index.js"
  }
}
이제 npm start를 실행할 수 있습니다. 브라우저를 열고 http : // localhost : 8000으로 이동하여 작동하는지 확인하십시오!
미드웨이 체크인
잘 지내? 물을 마시고 자세를 고정하고 어깨를 이완 시키세요 ?
좋은 부분에 도달하려고 합니다!
6 부 : index.js (업로드)
mongodb에 로컬 비디오를 업로드 할 수 있는 엔드 포인트를 추가합니다. 내가 사용 중인 비디오 파일은 bigbuck.mp4이며 https://github.com/Abdisalan/blog-code-examples/tree/master/http-video-stream의 github에서 찾을 수 있습니다.
그러나 자신의 비디오 파일을 사용할 수 있습니다!
const express = require("express");
const app = express();
const fs = require("fs");
const mongodb = require('mongodb');
const url = 'mongodb://localhost:27017';

app.get("/", function (req, res) {
  res.sendFile(__dirname + "/index.html");
});

// Sorry about this monstrosity -- just for demo purposes
app.get('/init-video', function (req, res) {
  mongodb.MongoClient.connect(url, function (error, client) {
    if (error) {
      res.json(error);
      return;
    }
    // connect to the videos database
    const db = client.db('videos');

    // Create GridFS bucket to upload a large file
    const bucket = new mongodb.GridFSBucket(db);

    // create upload stream using GridFS bucket
    const videoUploadStream = bucket.openUploadStream('bigbuck');

    // You can put your file instead of bigbuck.mp4
    const videoReadStream = fs.createReadStream('./bigbuck.mp4');

    // Finally Upload!
    videoReadStream.pipe(videoUploadStream);

    // All done!
    res.status(200).send("Done...");
  });
});

app.listen(8000, function () {
  console.log("Listening on port 8000!");
});
index.js 파일을 저장 한 후 서버를 다시 시작해야 합니다 (nodemon을 사용하고 있기 때문). 비디오가 준비되면 브라우저에서 localhost : 8000 / init-video로 이동하면 로컬 파일이 mongodb에 업로드 되었을 것입니다!
거의 다 왔어!
파일이 업로드 되었는지 다시 한 번 확인하려면 다른 터미널을 열고 mongodb에 연결하십시오.
mongo그런 다음 비디오 데이터베이스로 이동하여 GridFS의 fs.files 컬렉션에 있는 문서 수를 계산합니다.
use videos
db.fs.files.count()
/init-video를로드 할 때마다 동영상 파일을 업로드하기 때문에 개수는 localhost:8000/init-video로 이동 한 횟수여야 합니다.
7 부 : index.js (스트리밍)
마지막으로 비디오를 스트리밍 하기 위해 / mongo-video 엔드 포인트를 추가 할 것입니다!
app.get("/mongo-video", function (req, res) {
  mongodb.MongoClient.connect(url, function (error, client) {
    if (error) {
      res.status(500).json(error);
      return;
    }

    // Check for range headers to find our start time
    const range = req.headers.range;
    if (!range) {
      res.status(400).send("Requires Range header");
    }

    const db = client.db('videos');
    // GridFS Collection
    db.collection('fs.files').findOne({}, (err, video) => {
      if (!video) {
        res.status(404).send("No video uploaded!");
        return;
      }

      // Create response headers
      const videoSize = video.length;
      const start = Number(range.replace(/\D/g, ""));
      const end = videoSize - 1;

      const contentLength = end - start + 1;
      const headers = {
        "Content-Range": `bytes ${start}-${end}/${videoSize}`,
        "Accept-Ranges": "bytes",
        "Content-Length": contentLength,
        "Content-Type": "video/mp4",
      };

      // HTTP Status 206 for Partial Content
      res.writeHead(206, headers);

      // Get the bucket and download stream from GridFS
      const bucket = new mongodb.GridFSBucket(db);
      const downloadStream = bucket.openDownloadStreamByName('bigbuck', {
        start
      });

      // Finally pipe video to response
      downloadStream.pipe(res);
    });
  });
});
파일을 저장하고 localhost : 8000으로 한 번 더 이동하면 비디오가 스트리밍 됩니다!
결론
이것으로 나만의 기본 YouTube 또는 Netflix 앱을 만들 수 있습니다!
이것이 작동하는 방식에 대한 이론과 함께 한 줄씩 자세히 설명하려면 내 YouTube 비디오를 보는 것이 좋습니다.
https://dev.to/abdisalan_js/how-to-stream-video-from-mongodb-using-nodejs-4ibi
등록된 댓글이 없습니다.