expo에 익숙하지 않은 경우 빌드 복잡성이 적은 React Native 앱을 빌드 하는 데 도움이 되는 클라이언트입니다. 또한 React Native를 실행하기 위해 환경을 설치하고 설정하는 스트레스를 처리하는 데 도움이 됩니다.
이 튜토리얼에서는 사용자가 사진을 찍고, 사진 미리보기를 보고, 플래시 모드를 사용하고, 전면 카메라와 후면 카메라를 전환 할 수 있는 간단한 카메라 앱을 구축 할 것입니다.
전제 조건
Expo는 첫 번째 React Native 앱 빌드를 시작하는 데 많은 것을 요구하지 않습니다. 여기 문서에서 expo 및 expo-cli 설치에 대해 자세히 알아볼 수 있습니다.
참고 :이 튜토리얼에서는 macOS와 iOS를 사용합니다. 안드로이드도 사용할 수 있지만 이 시점에서 엑스포를 사용할 때 큰 차이는 없습니다.
다음 명령을 실행하여 expo 및 expo-cli를 전역으로 설치할 수 있습니다.
npm install --global expo-cliExpo를 실행하려면 Nodejs가 필요합니다. 여기 공식 웹 사이트에서 최신 버전을 실행할 수 있습니다.
시작하기
Expo 및 Nodejs를 설치 한 후 아래 명령을 사용하여 새 Expo 프로젝트를 부트 스트랩 할 수 있습니다.
expo init expo-camera-app패키지를 설치하고 앱을 실행하는 방법
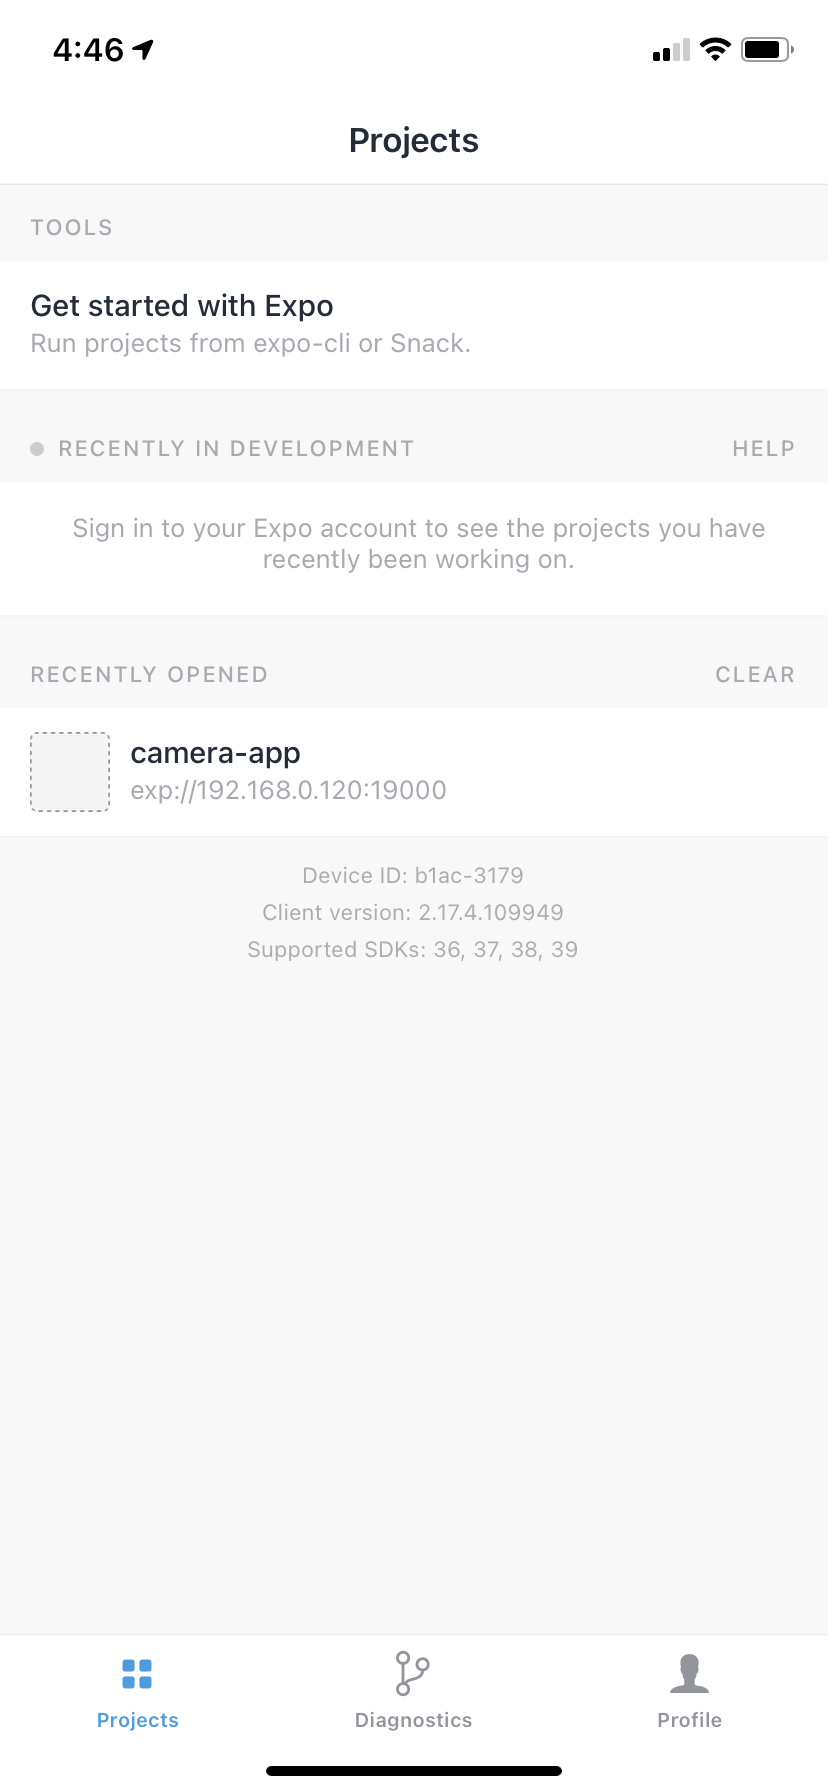
Expo는 우리가 만들고 있는 앱의 미리보기를 실행하고 볼 수 있는 클라이언트 앱을 제공합니다. App Store와 Google Play에서 모두 다운로드 할 수 있습니다.
이것은 앱의 인터페이스입니다.
엑스포 프로젝트를 시작하는 방법
앱 디렉토리로 이동하여 앱을 실행하십시오.
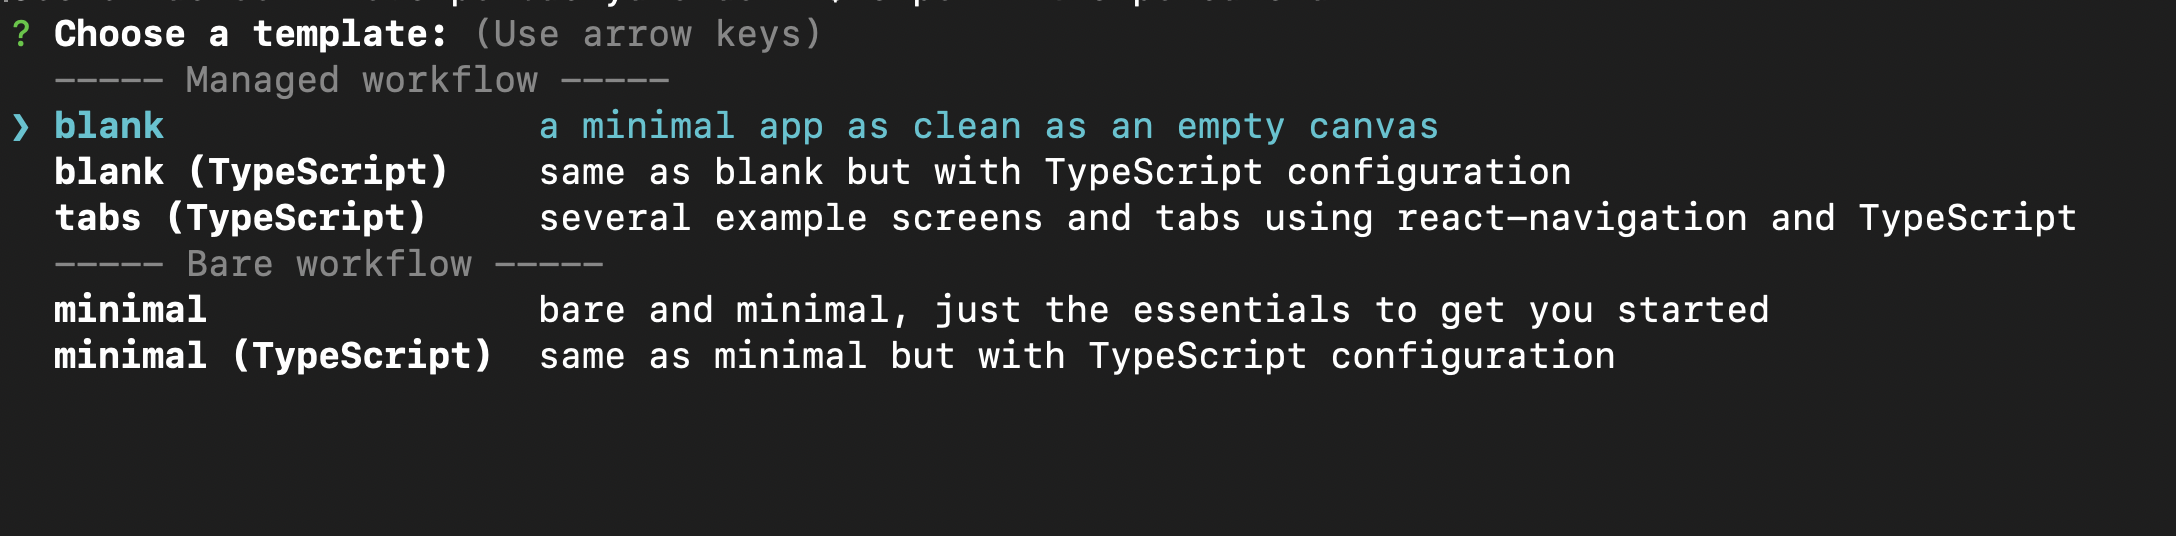
cd expo-camera-app앱의 기본 템플릿을 선택하기 위해 몇 가지 질문이 표시됩니다. 이 튜토리얼에서는 단순히 빈 (TypeScript) 옵션을 선택하지만, 자신에게 맞는 것을 자유롭게 선택할 수 있습니다.
앱 실행
프로젝트를 부트스트랩 한 후 expo run으로 앱을 실행할 수 있습니다.
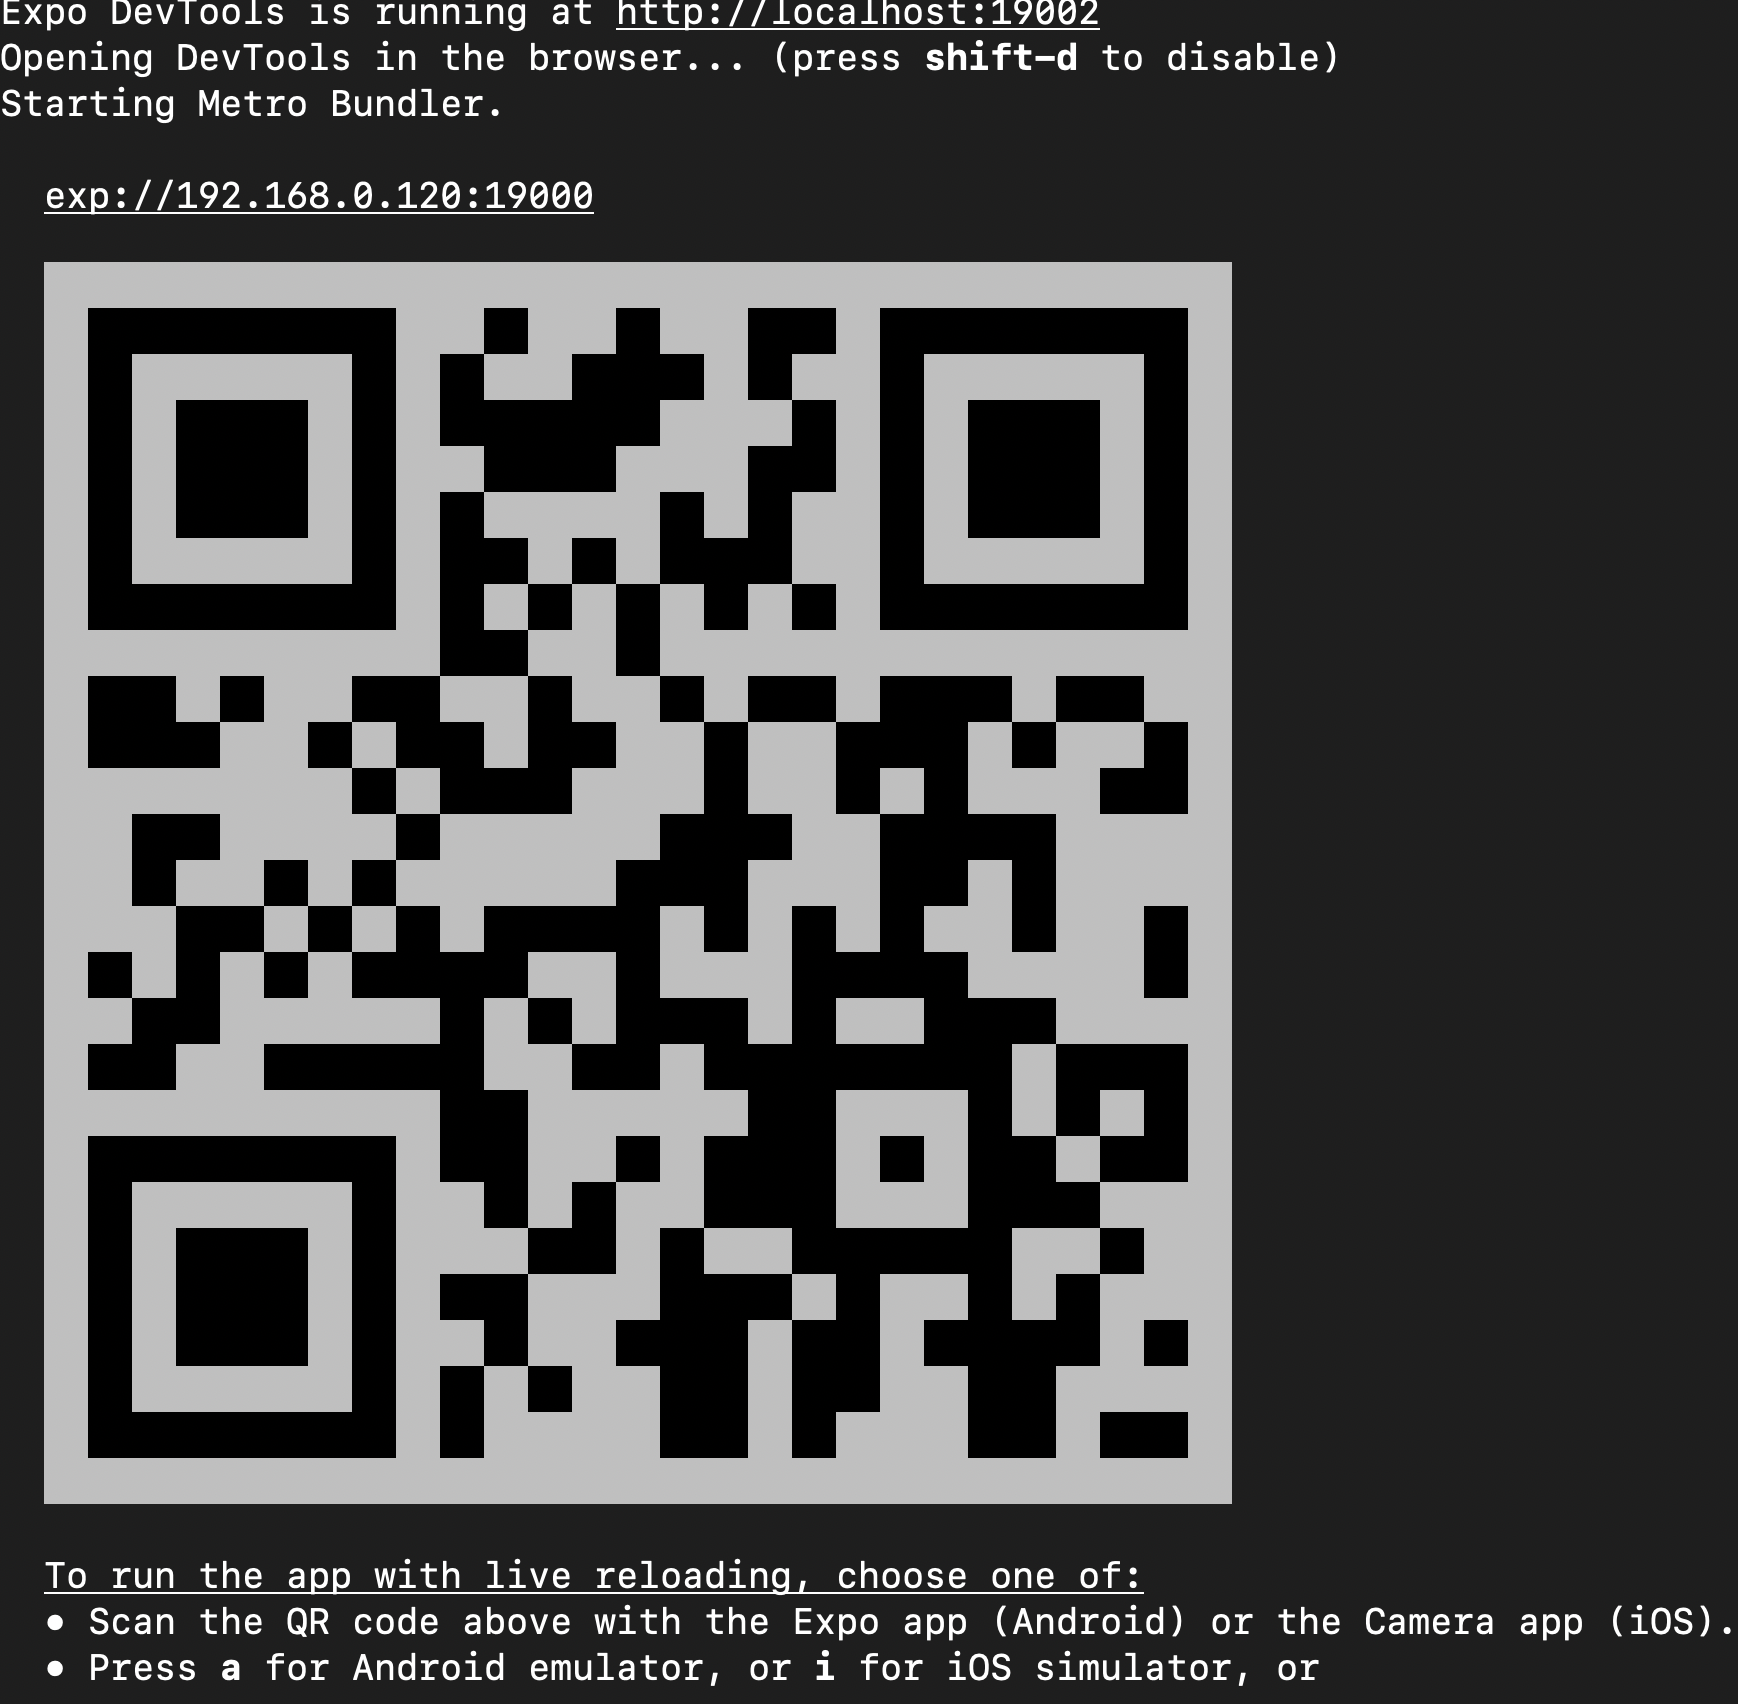
그러면 로그를 볼 수 있는 브라우저에 창이 열립니다. 또한 기기에서 앱을 실행하기 위해 스캔 할 수 있는 QR 코드를 생성합니다.
엑스포의 좋은 점은 앱을 실행하기 위해 시뮬레이터를 설치하고 구성 할 필요가 없다는 것입니다. 여전히 시뮬레이터에서 엑스포를 실행할 수 있는 옵션을 제공하지만 시뮬레이터를 직접 설치하고 구성해야 합니다.
우리 앱으로 돌아갑니다. 기기에서 앱을 성공적으로 실행했다고 가정하면 다음 화면이 기본 화면이 됩니다.

선호하는 코드 편집기에서 앱 디렉토리를 엽니다. VS Code를 사용하고 있습니다.
App.tsx는 다음과 같습니다.
import {StatusBar} from 'expo-status-bar'
import React from 'react'
import {StyleSheet, Text, View} from 'react-native'

export default function App() {
  return (
    <View style={styles.container}>
      <Text>Open up App.tsx to start working on your app!</Text>
      <StatusBar style="auto" />
    </View>
  )
}

const styles = StyleSheet.create({
  container: {
    flex: 1,
    backgroundColor: '#fff',
    alignItems: 'center',
    justifyContent: 'center'
  }
})
UI를 만드는 방법
프로젝트를 실행 한 후 이제 UI 생성을 시작할 차례입니다.
엑스포 카메라 설치
다음 단계는 다음과 같이 expo-camera를 설치하는 것입니다.
expo install expo-camera사용자가 카메라 사용 프로세스를 시작할 수 있는 간단한 UI를 만들 것입니다.

import {StatusBar} from 'expo-status-bar'
import React from 'react'
import {StyleSheet, Text, View, TouchableOpacity} from 'react-native'

export default function App() {
  return (
    <View style={styles.container}>
      <View
        style={{
          flex: 1,
          backgroundColor: '#fff',
          justifyContent: 'center',
          alignItems: 'center'
        }}
      >
        <TouchableOpacity
          style={{
            width: 130,
            borderRadius: 4,
            backgroundColor: '#14274e',
            flexDirection: 'row',
            justifyContent: 'center',
            alignItems: 'center',
            height: 40
          }}
        >
          <Text
            style={{
              color: '#fff',
              fontWeight: 'bold',
              textAlign: 'center'
            }}
          >
            Take picture
          </Text>
        </TouchableOpacity>
      </View>

      <StatusBar style="auto" />
    </View>
  )
}

const styles = StyleSheet.create({
  container: {
    flex: 1,
    backgroundColor: '#fff',
    alignItems: 'center',
    justifyContent: 'center'
  }
})
간단한 UI입니다. 버튼에 TouchableOpacity를 가져 와서 간단한 스타일을 지정합니다. React Native에서 스타일이 어떻게 작동하는지 궁금하다면 여기에서 두 기사를 확인할 수 있습니다.
이제 useState 후크를 사용하여 상태를 관리하고 사용자가 사진 촬영 버튼을 누를 때 카메라 뷰를 표시해야 합니다.
  <TouchableOpacity
        onPress={__startCamera}
          style={{
            width: 130,
            borderRadius: 4,
            backgroundColor: '#14274e',
            flexDirection: 'row',
            justifyContent: 'center',
            alignItems: 'center',
            height: 40
          }}
        >
          <Text
            style={{
              color: '#fff',
              fontWeight: 'bold',
              textAlign: 'center'
            }}
          >
            Take picture
          </Text>
        </TouchableOpacity>
const [startCamera,setStartCamera] = React.useState(false)
const __startCamera = ()=>{
}사용자가 버튼을 누를 때 해야 할 중요한 두 가지 사항이 있습니다.
다음 명령을 사용하여 expo-camera에서 카메라 모듈을 가져 오겠습니다.
import {Camera} from 'expo-camera'다음과 같이 카메라 뷰를 추가합니다.
    <Camera
    style={{flex: 1,width:"100%"}}
    ref={(r) => {
    camera = r
    }}
    ></Camera>
ref를 사용하여 카메라의 메서드에 액세스 할 수 있습니다.
let camera: Camera사진 촬영 버튼을 누르면 __startCamera 함수가 호출됩니다.
const __startCamera = async () => {
    const {status} = await Camera.requestPermissionsAsync()
 if(status === 'granted'){
   // do something

 }else{
   Alert.alert("Access denied")
 }
이 함수는 먼저 권한을 요청합니다. 사용자가 카메라에 대한 액세스 권한을 부여하면 계속해서 카메라를 열 수 있습니다. 그렇지 않은 경우 간단한 경고를 표시합니다.
카메라 구성 요소 추가
사용자가 장치의 카메라에 대한 액세스 권한을 부여하면 카메라를 표시해 보겠습니다.
  const __startCamera = async () => {
    const {status} = await Camera.requestPermissionsAsync()
    if (status === 'granted') {
      // start the camera
      setStartCamera(true)
    } else {
      Alert.alert('Access denied')
    }
  }
UI를 약간 변경하고 조건부 렌더링을 추가해야 합니다. 사용자가 요청할 때만 카메라를 표시하고, 그렇지 않으면 기본 화면을 표시합니다.
 {startCamera ? (
        <Camera
          style={{flex: 1,width:"100%"}}
          ref={(r) => {
            camera = r
          }}
        ></Camera>
      ) : (
        <View
          style={{
            flex: 1,
            backgroundColor: '#fff',
            justifyContent: 'center',
            alignItems: 'center'
          }}
        >
          <TouchableOpacity
            onPress={__startCamera}
            style={{
              width: 130,
              borderRadius: 4,
              backgroundColor: '#14274e',
              flexDirection: 'row',
              justifyContent: 'center',
              alignItems: 'center',
              height: 40
            }}
          >
            <Text
              style={{
                color: '#fff',
                fontWeight: 'bold',
                textAlign: 'center'
              }}
            >
              Take picture
            </Text>
          </TouchableOpacity>
        </View>
      )}
이제 실제 사진을 찍을 수 있도록 버튼을 추가해야 합니다.
캡처 버튼 추가
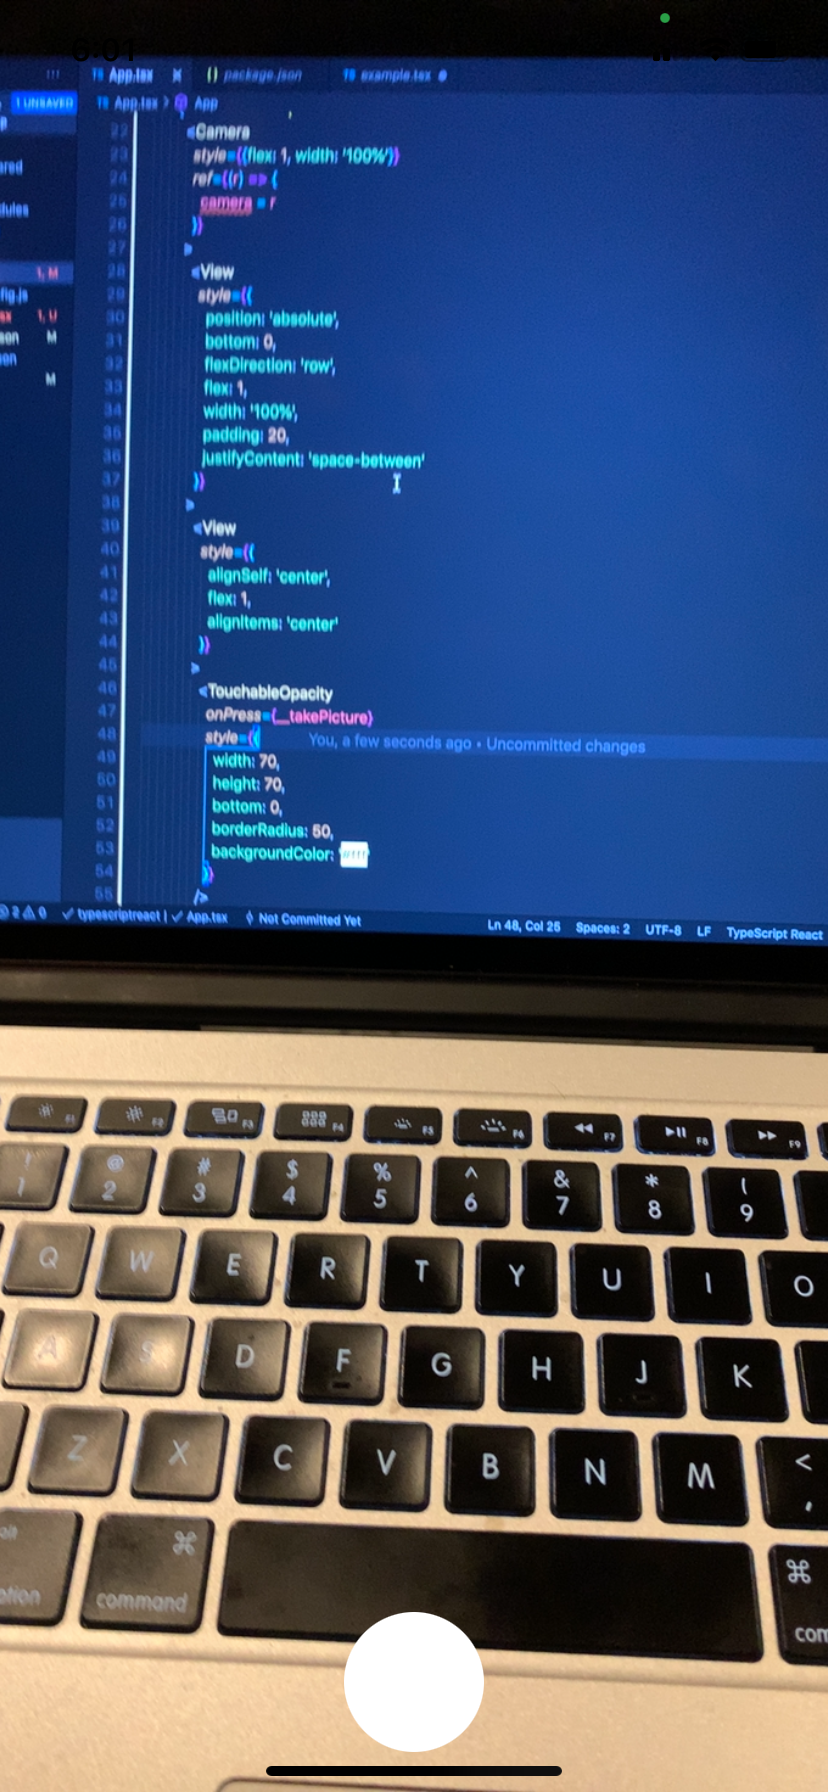
이것은 절대 위치가 있는 카메라 뷰 내부의 간단한 뷰입니다. 그래서 우리는 항상 카메라 상단에 있는지 확인합니다.
    <View
        style={{
        position: 'absolute',
        bottom: 0,
        flexDirection: 'row',
        flex: 1,
        width: '100%',
        padding: 20,
        justifyContent: 'space-between'
        }}
      >
        <View
        style={{
        alignSelf: 'center',
        flex: 1,
        alignItems: 'center'
        }}
        >
            <TouchableOpacity
            onPress={__takePicture}
            style={{
            width: 70,
            height: 70,
            bottom: 0,
            borderRadius: 50,
            backgroundColor: '#fff'
            }}
            />
    </View>
    </View>
사진 찍는 방법
캡처 버튼을 누르면 앱이 사진을 찍어야 합니다. 해당 기능은 다음과 같습니다.
  const __takePicture = async () => {
    if (!camera) return
    const photo = await camera.takePictureAsync()

  }
먼저 ref를 사용하여 카메라 구성 요소에 액세스 할 수 있는지 확인합니다.
  if (!camera) return
  // if the camera is undefined or null, we stop the function execution
그런 다음 takePictureAsync 메서드를 호출하여 사진을 찍습니다. 약속과 그림의 세부 사항을 포함하는 객체를 반환합니다. 결과는 다음과 같습니다.
Object {
  "height": 4224,
  "uri": "file:///var/mobile/Containers/Data/Application/E6740A15-93AF-4120-BF11-6E8B74AFBF93/Library/Caches/ExponentExperienceData/%2540anonymous%252Fcamera-app-ee0fa3c8-1bb1-4d62-9863-33bf26341c55/Camera/19F0C5DD-7CA6-4043-8D89-AF65A1055C7E.jpg",
  "width": 1952,
}
우리는 그림 URL uri에만 관심이 있습니다. 사진을 찍은 후 사진 미리보기를 표시하고 카메라 뷰를 숨겨야 합니다. 이를 위해 상태를 변경하기 위해 두 개의 후크를 사용합니다.
const [previewVisible, setPreviewVisible] = useState(false)
  const [capturedImage, setCapturedImage] = useState<any>(null)
const __takePicture = async () => {
if (!camera) return
const photo = await camera.takePictureAsync()
console.log(photo)
setPreviewVisible(true)
setCapturedImage(photo)
}그런 다음 다음과 같이 미리보기를 표시합니다.
  {previewVisible && capturedImage ? (
            <CameraPreview photo={capturedImage} />
          ) : (
            <Camera
              style={{flex: 1}}
              ref={(r) => {
                camera = r
              }}
            >
              <View
                style={{
                  flex: 1,
                  width: '100%',
                  backgroundColor: 'transparent',
                  flexDirection: 'row'
                }}
              >
                <View
                  style={{
                    position: 'absolute',
                    bottom: 0,
                    flexDirection: 'row',
                    flex: 1,
                    width: '100%',
                    padding: 20,
                    justifyContent: 'space-between'
                  }}
                >
                  <View
                    style={{
                      alignSelf: 'center',
                      flex: 1,
                      alignItems: 'center'
                    }}
                  >
                    <TouchableOpacity
                      onPress={__takePicture}
                      style={{
                        width: 70,
                        height: 70,
                        bottom: 0,
                        borderRadius: 50,
                        backgroundColor: '#fff'
                      }}
                    />
                  </View>
                </View>
              </View>
            </Camera>
          )}
CameraPreview 구성 요소는 다음과 같습니다.
const CameraPreview = ({photo}: any) => {
  console.log('sdsfds', photo)
  return (
    <View
      style={{
        backgroundColor: 'transparent',
        flex: 1,
        width: '100%',
        height: '100%'
      }}
    >
      <ImageBackground
        source={{uri: photo && photo.uri}}
        style={{
          flex: 1
        }}
      />
    </View>
  )
}
결과는 다음과 같습니다.

사진을 다시 찍는 방법
사용자가 더 많은 작업을 수행 할 수 있도록 미리보기에 몇 가지 버튼을 추가 할 수 있습니다. 예를 들어 사진을 다시 찍거나 저장할 수 있습니다.
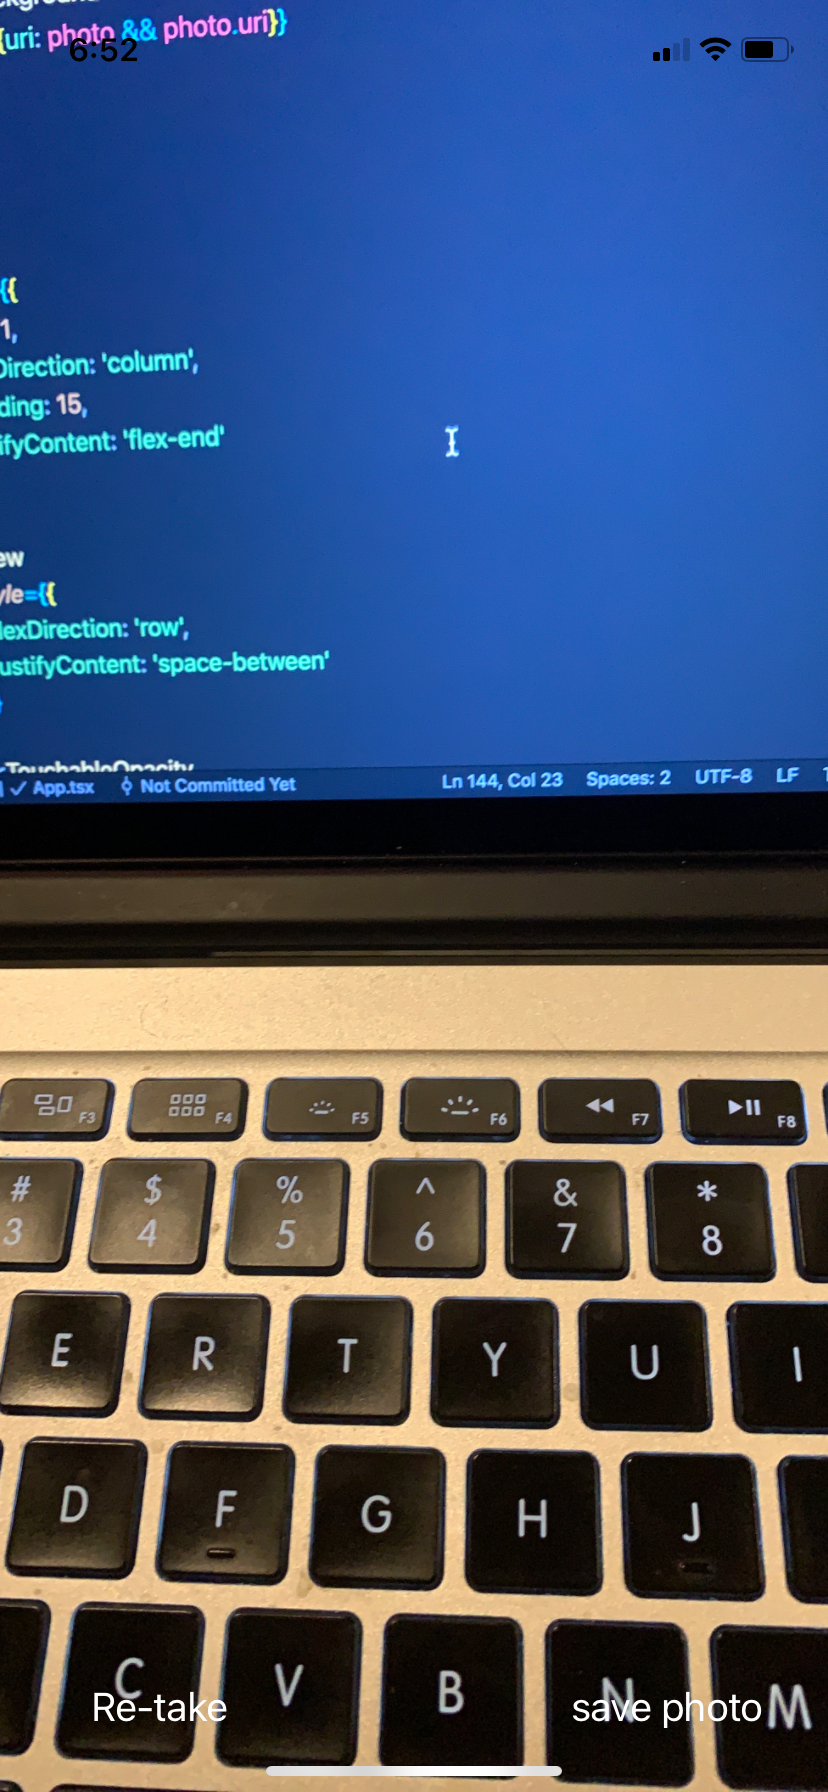
savePhoto 및 retakePicture 소품을 다음과 같이 CameraPreview 구성 요소에 추가합니다.
<CameraPreview photo={capturedImage} savePhoto={__savePhoto} retakePicture={__retakePicture} />재 촬영 버튼을 누르면 미리보기를 숨기고 현재 사진을 제거한 다음 카메라를 다시 표시해야 합니다. 다음 코드로 수행하십시오.
  const __retakePicture = () => {
    setCapturedImage(null)
    setPreviewVisible(false)
    __startCamera()
  }
다른 옵션을 추가하는 방법 – 후면 카메라, 플래시 등
expo-camra는 FlashMode, 카메라 유형 (전면 / 후면) 설정, 확대 / 축소 등과 같은 카메라 사용자 정의를 위한 다양한 옵션을 제공합니다.
FlashMode를 추가하는 방법
사용자가 FlashMode를 켜고 끌 수 있도록 옵션을 추가해 보겠습니다.
다음과 같이 플래시를 켜고 끄는 작은 버튼을 만듭니다.
      <TouchableOpacity
            onPress={__handleFlashMode}
            style={{
            position: 'absolute',
            left: '5%',
            top: '10%',
            backgroundColor: flashMode === 'off' ? '#000' : '#fff',
            borderRadius: '50%',
            height: 25,
            width: 25
        }}
        >
            <Text
                style={{
                fontSize: 20
                }}
            >
            ⚡️
            </Text>
        </TouchableOpacity>
그리고 버튼을 눌렀을 때 상태를 변경합니다.
  const [flashMode, setFlashMode] = React.useState('off')

   const __handleFlashMode = () => {
    if (flashMode === 'on') {
      setFlashMode('off')
    } else if (flashMode === 'off') {
      setFlashMode('on')
    } else {
      setFlashMode('auto')
    }

  }
그런 다음 FlashMode 소품을 추가합니다.
    <Camera
    flashMode={flashMode}
    style={{flex: 1}}
    ref={(r) => {
    camera = r
    }}
    ></Camera>
전면 및 후면 카메라에 액세스하는 방법
후면 카메라와 전면 카메라 사이를 전환하는 버튼을 추가합니다.
아래와 같이 카메라 모듈에서 직접 기본 카메라 유형을 가져올 수 있습니다.
const [cameraType, setCameraType] = React.useState(Camera.Constants.Type.back)다음과 같은 유형 소품을 추가합니다.
    <Camera
    type={cameraType}
    flashMode={flashMode}
    style={{flex: 1}}
    ref={(r) => {
    camera = r
    }}
    ></Camera>
그리고 스위치 버튼을 추가합니다.
<TouchableOpacity
    onPress={__switchCamera}
    style={{
    marginTop: 20,
    borderRadius: '50%',
    height: 25,
    width: 25
    }}
   >
       <Text
           style={{
           fontSize: 20
           }}
           >
       {cameraType === 'front' ? '?' : '?'}
       </Text>
</TouchableOpacity>
스위치 함수 :
  const __switchCamera = () => {
    if (cameraType === 'back') {
      setCameraType('front')
    } else {
      setCameraType('back')
    }
  }
결과는 다음과 같습니다.
GitHub에서 전체 소스 코드를 찾을 수 있습니다.
마무리
일반적으로 Expo는 많은 시간을 절약 할 수 있는 놀라운 도구입니다. 직접 구축을 시작하고 환경 설정의 어려움을 덜어줍니다.
때로는 기본 확장을 빌드하고 고유 한 방식으로 기본 기능 사용을 처리 할 수 있습니다. 이 경우 네이티브 코드를 쉽게 수정하고 사용할 수 있도록 react-native CLI를 사용하는 것이 좋습니다.
등록된 댓글이 없습니다.